Github Tutorial 1
Introduction and Context
GitHub is a web-based platform for hosting Git repositories, enabling teams to track changes, review code, and manage projects collaboratively. By the end of this tutorial, you’ll be able to initialize a repository, work on feature branches, record changes with commits, propose updates via pull requests, and merge them into your main code line.
Case Study Overview
Problem Statement Alex has just joined TechStart’s engineering team and must demonstrate proficiency with GitHub’s core workflows. Their task is to set up a public “hello-world” repository, collaborate with remote teammates, and maintain a clear, auditable history. This exercise ensures all new hires follow a standardized development process, reducing merge conflicts and fostering consistent code quality across the organization. Success looks like a clean commit history, a merged pull request, and removal of the feature branch once work is complete.
Learning Objectives
-
Create and configure a GitHub repository (public vs. private)
-
Clone and initialize projects locally
-
Create and switch branches
-
Make and commit changes with descriptive messages
-
Open, review, and merge pull requests
-
Use both GUI (GitHub website) and CLI (Git, GitHub CLI) methods
Concepts Explained with Analogies
Repository
Analogy: A digital folder that holds every version of your project-like a library that archives all book editions.
Technical: A Git repository stores files, history, and branches in a single project container on GitHub
Branch
Analogy: A recipe variant-like making a gluten-free version of a cake without altering the original.
Technical: A branch is an independent line of development, isolated from the default main branch until merged
Commit
Analogy: A journal entry describing the changes you’ve made since the last entry.
Technical: A commit captures a snapshot of staged changes with a message explaining why they were made
Pull Request
Analogy: Submitting your edited chapter to an editor for review before it’s added to the final book.
Technical: A pull request (PR) proposes merging one branch into another, shows diffs, and facilitates discussion and reviews
Merge
Analogy: Integrating your recipe variant back into the main cookbook, combining all approved changes.
Technical: A merge incorporates commits from a feature branch into another branch, often the default main
Step-by-Step Guided Walkthrough
Step 1: Create the Repository
GUI Method (GitHub Website)
-
In the upper-right corner of any page, select , then click New repository.

-
In the "Repository name" box, type
hello-world. -
In the "Description" box, type a short description. For example, type "This repository is for practicing the GitHub Flow."
-
Select whether your repository will be Public or Private.
-
Select Add a README file.
-
Click Create repository.
CLI Method
#Create local folder and initialize Git
mkdir hello-world && cd hello-world
git init                                        # Initialize local repo
#Add remote origin and push initial commit
git remote add origin https://github.com/<you>/hello-world.git
echo "# hello-world" > README.md
git add README.md
git commit -m "feat: initial commit with README" # Stage and commit
git push -u origin main                         # Push to GitHub
Checkpoint: What is the purpose of the README file in your repo?
Step 2: Create a Feature Branch
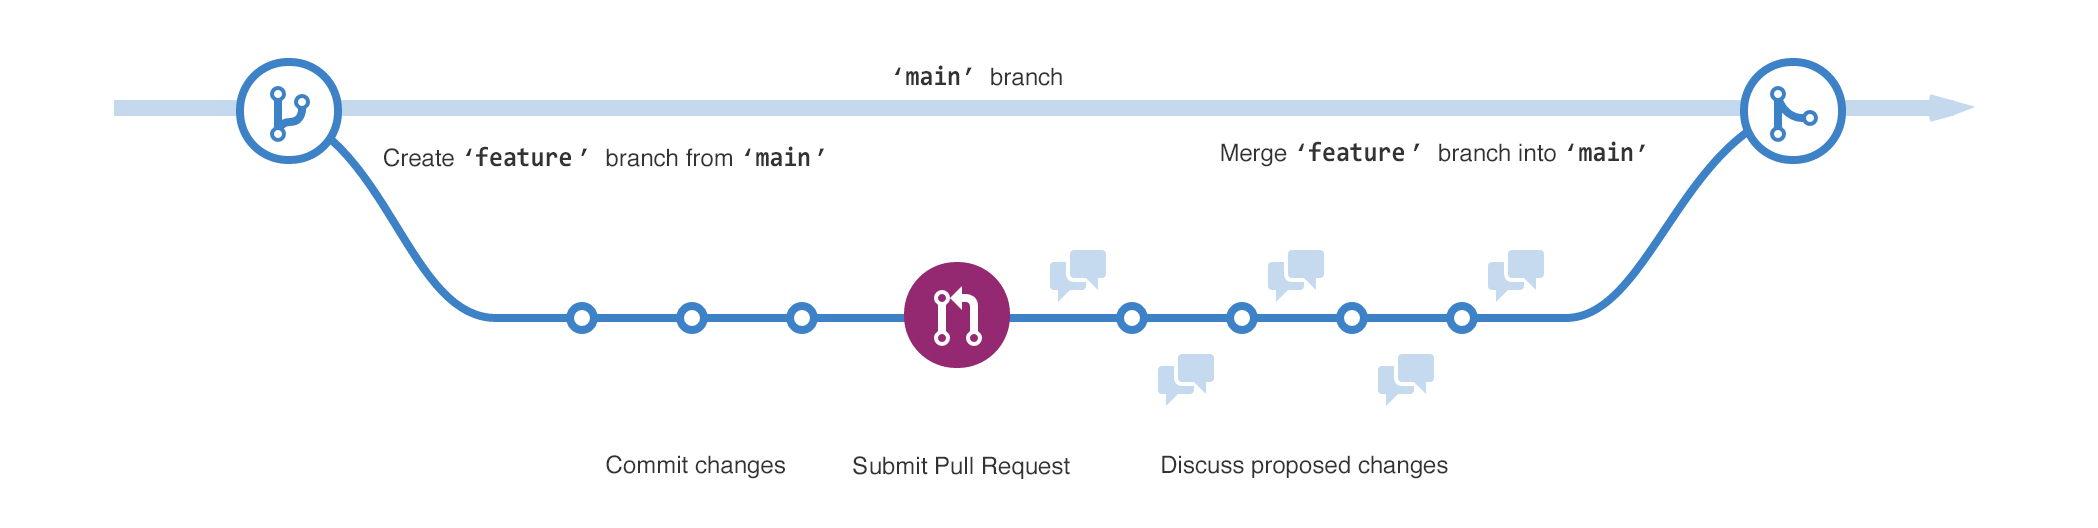
This diagram shows:
- The
mainbranch - A new branch called
feature - The journey that
featuretakes through stages for "Commit changes," "Submit pull request," and "Discuss proposed changes" before it's merged intomain
GUI Method
Creating a branch
-
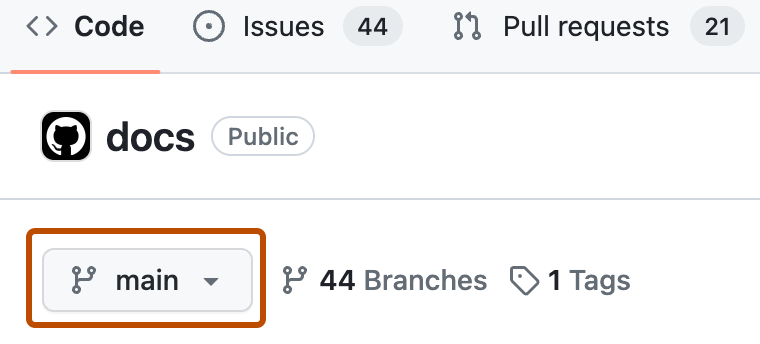
Click the Code tab of your
hello-worldrepository. -
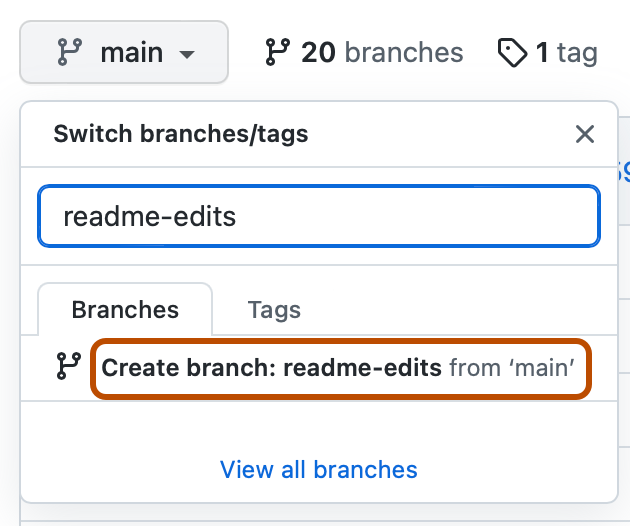
Above the file list, click the dropdown menu that says main.
-
Type a branch name,
readme-edits, into the text box. -
Click Create branch: readme-edits from main.
Now you have two branches, main and readme-edits. Right now, they look exactly the same. Next you'll add changes to the new readme-edits branch.
CLI Method
git fetch origin && git checkout -b readme-edits origin/main # Create & switch to branch
Checkpoint: Why work on a branch instead of directly committing to main?
Step 3: Make and Commit Changes
GUI Method
-
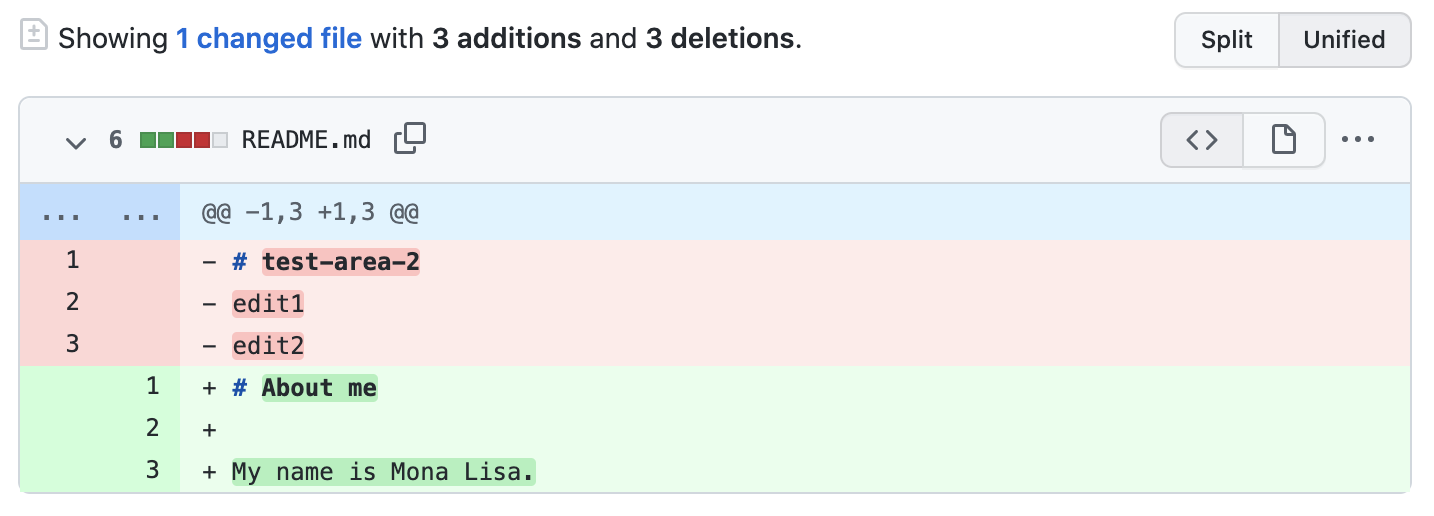
Under your
readme-editsbranch, open README.md and click the pencil icon. -
Edit content (e.g., add a personal bio), scroll down, enter a commit message like “docs: add personal bio”, and click Commit changes
CLI Method
nano README.md                         # Edit file locally
git add README.md                     # Stage changes[15]
git commit -m "docs: add personal bio" # Commit with message[15]
git push -u origin readme-edits       # Push branch to GitHub[15]
Checkpoint: How does staging (git add) differ from committing?
Step 4: Open a Pull Request
GUI Method
-
Click the Pull requests tab of your
hello-worldrepository. -
Click New pull request.
-
In the Example Comparisons box, select the branch you made,
readme-edits, to compare withmain(the original). -
Look over your changes in the diffs on the Compare page, make sure they're what you want to submit.
-
Click Create pull request.
-
Give your pull request a title and write a brief description of your changes. You can include emojis and drag and drop images and gifs.
-
Click Create pull request.
CLI Method
gh pr create --base main --head readme-edits \
  --title "Update README with bio" \
  --body "Adds a short bio for practice"        # Create PR via GitHub CLI
Checkpoint: What key information should you include in a pull request description?
Step 5: Merge Your Pull Request
GUI Method
-
Scroll to the bottom of the PR, click Merge pull request, then Confirm merge.
-
Click Delete branch to remove
readme-editsafter merging
CLI Method
gh pr merge readme-edits --merge --delete-branch # Merge and delete branch
Checkpoint: Why delete feature branches after merging?
Best Practices and Tips
-
Use imperative, concise commit messages (e.g., “fix: typo in README”) following community standards
-
Keep branches short-lived and focused on a single task to minimize merge conflicts
-
Always pull the latest
mainbefore creating or updating a branch (git pull origin main). -
Leverage code reviews in pull requests to catch errors early and share knowledge
-
Delete merged branches to reduce clutter and indicate completed work
Real-World Application and Extension
-
CI Integration: Add a GitHub Actions workflow to run tests on each PR.
-
Project Boards: Use Issues and Projects to manage feature progress and bugs.
-
Community Contribution: Explore “good first issues” in other repos and submit PRs to real-world projects